According to GitHut, the use of JavaScript has increased dramatically over the past few years, and this is mostly because the community has ignited a lot of open source projects that were backed by big companies. The community has grown so big that there are currently more than 1 million JavaScript repositories on GitHub which are open source! In this article, I will present the JavaScript libraries that I've found to be so useful for JavaScript developers that they can be considered as a starter kit.
jQuery
I am sure that even non-Web developers have heard about jQuery. This library is now the de facto one when it comes to styling and basic DOM operations. jQuery was designed to overcome the platform specific issues and APIs within browsers. The first version of the library appeared in 2006, and over the years it has been picked up by big software players such as Microsoft (jQuery is built in Visual Studio for ASP.NET AJAX).
jQuery is a JavaScript library for front-end development that supports easier HTML element creation, event handling, and styling. A great way to learn jQuery is to use their tutoring website, try.jquery.com.
You can start using jQuery in three ways. Download it from the jQuery official website and add it to your project, use jQuery’s CDN for loading certain versions of the library, or use bower to install jQuery to your project.
Using bower install:
jupiter:tmp2 gergo_bogdan$ bower install jquery
bower jquery#*              not-cached git://github.com/jquery/jquery-dist.git#*
bower jquery#*                 resolve git://github.com/jquery/jquery-dist.git#*
bower jquery#*                download https://github.com/jquery/jquery-dist/archive/2.2.1.tar.gz
bower jquery#*                 extract archive.tar.gz
bower jquery#*                resolved git://github.com/jquery/jquery-dist.git#2.2.1
bower jquery#~2.2.1            install jquery#2.2.1

jquery#2.2.1 bower_components/jquery
Using a jQuery’s CDN:
<!DOCTYPE html>
<html>
    <head>
        <!-- Include jQuery from CDN -->
        <script src="//code.jquery.com/jquery-1.12.0.min.js"></script>

        <!-- Include jQuery from Googl's CDN -->
        <script src="https://ajax.googleapis.com/ajax/libs/jquery/1.12.0/jquery.min.js"></script>
    </head>
    <body>
        <h1>jQuery from CDN</h1>
    </body>
</html>
Capabilities of jQuery
jQuery has a lot of features that can be used to develop complete Web applications using only this single library. The most widely used feature of jQuery is HTML element lookup and reading or updating HTML element content.
In the example below, you can see how can you find the paragraph HTML element, which stores the list of authors of an article and makes text upper case.
          $(document).ready(function() {
            var authors = $(".authors");
            $.each(authors, function(idx, item) {
              $(item).text($(item).text().toUpperCase());
            });
          });
The first line of the code makes sure that the function parameter given to the ready() method will be executed once the DOM and the browser is ready to run JavaScript and support possible DOM manipulations. The first line in the anonymous function is the lookup of the authors, where we look up all the HTML elements that have the authors CSS class. As you can see, jQuery is using CSS Selectors for finding elements within the DOM. The result of this query will be an array of HTML elements.
In the next line we create a new foreach loop. The method is called each, and it receives two parameters, an array of elements, and a callback function that will be invoked for each element of the array. The first parameter passed to the callback is the index of the element in the array, while the second is the element from the array. The fourth line of the code changes the author names to upper case letters. This is the line where the current item’s text is updated to uppercase letters.
jQuery can handle HTML events, such as a mouse click. In the code below, we assign a new event handler to a click event of a button, and every time it is clicked we change the color of the button to a random color.
$(document).ready(function() {
            var colors = ["red", "green", "blue", "orange", "grey", "teal", "purple"];
            var btnColorChanger = $("#btnColorChanger")[0];
            $(btnColorChanger).click(function(e) {
              var randomColorIdx = Math.floor(Math.random() * 100) % colors.length;
              var randomColor = colors[randomColorIdx];
              console.info("Changing the Button's color to:" + randomColor);
              $(btnColorChanger).css('color', randomColor);
            });
});
Here we are using the same ready() function we used before. We define an array of colors which will be used for updating the button’s color. On line three, we lookup the button which has the btnColorChanger id. On the fourth line, we assign an event handler to the click event of the button. We are using the click() method from jQuery. The JavaScript engine will pass in an event object to the event handler function (see the e parameter). Inside the event handler we first generate a random number between 0 and 7 (the length of the colors array) and then we store this number in the randomColorIdx variable. Next, we select the color from colors array and we log it to the console. The last line of the event handler uses the jQuery css() method to update the style property of the button HTML element. The css() method can be used multiple times on the same HTML element and behind the scenes the css() method will build and update the style attribute.
These are only some of the mostly used features of jQuery, without covering advanced topics like AJAX requests or Promises.
Node.js
With jQuery, we covered a client-side library that can be used to create rich and powerful Web applications. Now let’s take a look at the Node.js, the server-side JavaScript runtime that was built using Chrome’s V8 JavaScript engine. The beauty of Node.js is that you can write applications that will be executed on the server side without a browser. Now we will create a new server which will return the current time in UTC format:
"use strict";

var http = require("http");

http.createServer(function (req, res) {
    console.info("NEW [" + req.method + "] request from " + req.url);
    res.writeHead(200, {'Content-Type': 'text/plain'});
    res.end(new Date().toUTCString() + '\n');
}).listen(8000, '127.0.0.1');
First we make sure that we are using strict mode. Next, we load the http module from the node.js framework using the require(“http”) statement. This module is needed so we can create a new server that can listen for connections and HTTP requests on a port we specify. The http.createServer() method has to be given a function parameter that handles the requests and builds up the responses.
On the first line of the request handler function, we log what type of request we received and where it came from to the console. On the next line, we set the proper HTTP headers of the response. In this case, the status code is set to 200, meaning we have successful http request handling and we set the content-type to text/plain. This could be anything else, application/json for JSON data, or video/mp4 for media files. The last line of the function creates a new date object and converts that to UTC time format. The res.end() method builds up the response object and sends it back to the client after which it closes the connection. Using pure Node.js, we can do really great stuff on the server side.
To be more efficient, we would need to add Express.js, which is a Web application framework built using Node. Express can be installed using npm, the Node Package Manager, which is a utility app that ships with Node.js that offers a huge amount of packages we can select from. For the list of packages, you can check out the NPM homepage.
In this code, we create a new express server, which is running on port 3000. We register two routes in our app – one is /random which returns random numbers between 0 and 10000; the second one is the /now which returns the current time formatted to UTC’s value.
(function () {
    "use strict";

    var express = require('express');
    var app = express();

    app.get('/random', function (req, res) {
        res.send({
            "number": Math.floor(Math.random() * 10000)
        });
    });

    app.get('/now', function (req, res) {
        res.send({
            "currentTime": new Date().toUTCString()
        });
    });

    app.listen(3000, function () {
        console.log('Example app listening on port 3000!');
    });
})();
The res.send() method can take multiple parameters like JSON objects, Arrays or Node.js Buffer objects. As you can see, Express offers nice wrapper methods for routing, like the get() method that handles HTTP GET requests coming towards the server. In vanilla Node.js you would need to check if the request.method property is GET or another HTTP verb and the logic within your server based on that route.
Using Express and Node you can build very powerful server side applications that can serve as backend for Web applications.
Tools for JS Development
Every developer has its own set of tools that he sticks to. Depending on your mood you may want to use an IDE (Integrated Development Environment) or only an editor for development. For anybody who starts programming now, I would recommend to start with the editor, because in many cases typing out all the code is the real learning experience, IDEs provide much more help to the developers, as they were designed to boost productivity. When I need to be really productive, I use an IDE, but when I want to learn a new technology I always stick with an editor.
Atom for JS
I really like Atom, the hackable text editor. It has a lot of plugins, themes, and linters for validating your code. Here is a screenshot of Atom with material design and JavaScript linters added:
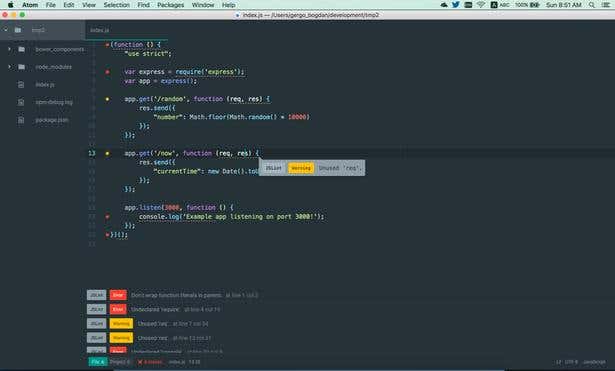
Atom also has a package manager called apm, or Atom Package Manager. I have the following packages installed: atom-beautify, jslint, linter, linter-jshint, linter-jslint.
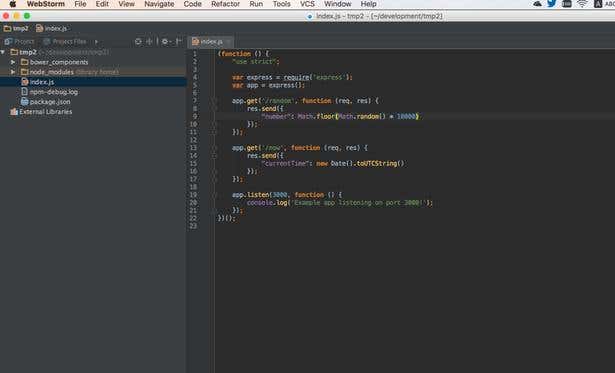
If you want to use an IDE for JavaScript development, I would go with WebStorm. The big advantage of an IDE shows up when you need to debug your applications and you need to add conditional breakpoints or update some values within the running code. Of course, all these can be done using for example the Node.js Debugger, but that is a command line tool. Having a UI for debugging makes things more visual and easier to work with. Here is a screenshot of my WebStorm IDE, with the same code:
Debuggers
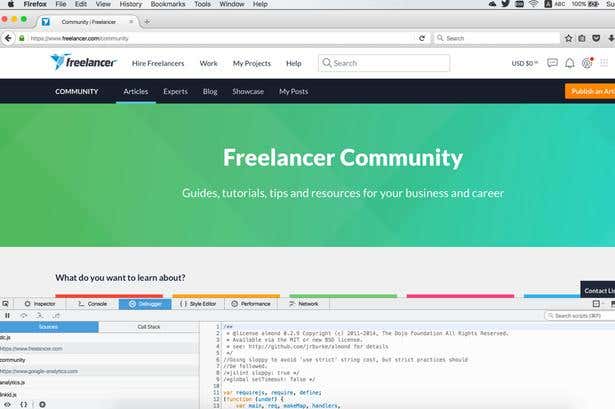
When you are developing any application using any programming language, sooner or later you will need a debugger to identify errors in the code. Luckily, JavaScript has a lot of debuggers available. Since JavaScript code runs in the browser in most cases, browsers do have a debugger – a tool called Developer tools. In this screenshot you can see the developer tools within Firefox:
Google’s Chrome has good developer tools too:
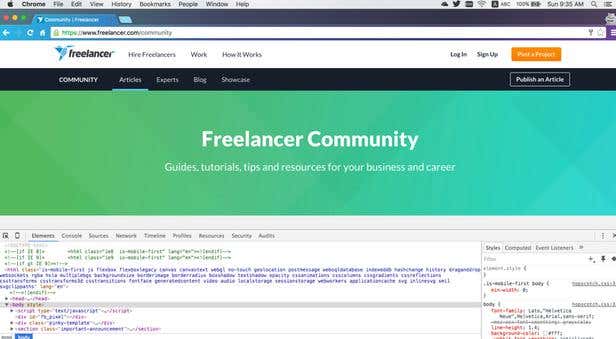
Using these developer tools, we can inspect basically anything on our website, starting from HTML elements, network traffic, and source files. Of course, we can also use it to debug the JavaScript code.
In this article we have reviewed the basic tools and libraries which are needed by a JavaScript developer. For the client-side development, we touched on jQuery, and for the server side we covered Node.js. Then we covered some useful tools for development, as well as debugging tools. While all of these tools have alternatives, these are just the ones I am used to and those that I feel comfortable using for development. Feel free to try others.